
Key takeaways
- Offline GPS maps and satellite communication (Garmin InReach or PLB) are not optional on remote routes; cell service does not exist where it matters.
- Carry spare chain, brake pads, spokes, tubes, and basic tools—mechanical failures are predictable and fixable if you have the parts.
- Pre-ride research on current conditions and filed itinerary with a contact can mean the difference between a minor delay and a search and rescue operation.
- Acclimatize for altitude before hard riding, and check weather for the entire region, not just your location, to avoid flash floods and exposure.
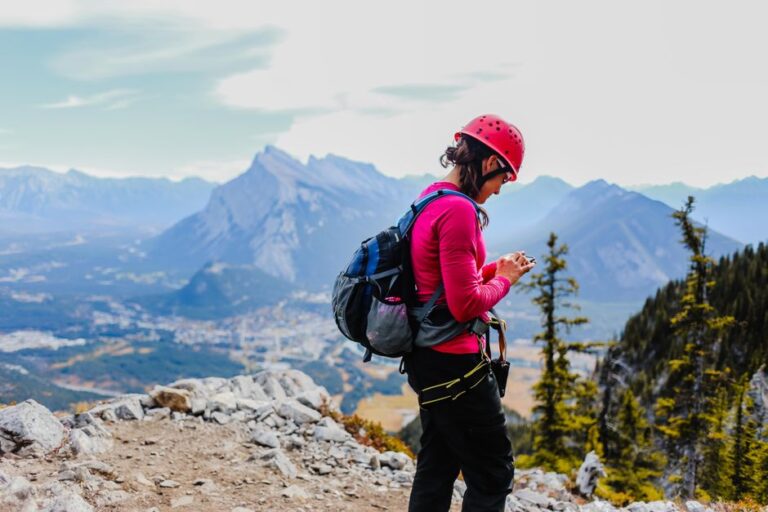
Remote cycling demands different risk management than day rides near town. On routes like the Kokopelli Trail in Utah or the Choquequirao Trek access routes in Peru, riders face multiple hours without help, variable terrain, and limited communication. The margin for error narrows: a simple mechanical failure becomes serious, a minor weather shift turns dangerous, and injuries need immediate attention without professional help nearby.
Navigation and Route Intelligence
Knowing exactly where you are and where you’re going prevents the disorientation and time pressure that lead to mistakes. Before leaving, download offline maps on a dedicated GPS device like a Garmin eTrex series ($150–$400) or on smartphone apps like Maps.me and Gaia GPS, which work without cell signal. Paper topographic maps in 1:24,000 scale remain reliable when electronics fail and take minimal pack space.
Research the route in detail: the most direct way is rarely the safest. Check recent trip reports from sites like BikePackingIt or CyclingAbout from riders who completed the route in the past six months—snow bridges collapse, stream crossings become impassable, and rockfall blocks new sections. Contact local ranger stations for current conditions; a ranger in the Lake Tahoe region can confirm whether high passes are still snowbound in July or passable.
Calculate daylight hours for your riding dates using timeanddate.com. On the Kona Coastal Trail in Hawaii, winter rides have only ten hours of daylight; getting caught on that route after dark on rocky, exposed terrain creates serious fall risk. Plan to finish your riding day well before sunset, ideally arriving at camp two hours before dark.
Water and Supply Planning
Identify water sources before departure using guidebooks or bikepacking.com, which lists reliable water sources for multi-day routes. In the Southwest like the White Rim Trail near Moab, some sections span 30+ miles between water, forcing you to carry enough for the gap. A 2-liter reservoir weighs 4.4 pounds full; knowing whether you can refill at mile 15 or not until mile 35 changes your load plan and pacing strategy.
Carry a water filter rated for cryptosporidium, like a Sawyer Squeeze ($25–$30), because untreated stream water commonly carries parasites causing serious gastrointestinal illness days after exposure—a risk present even on heavily trafficked routes.
Mechanical Redundancy and Tool Kit
Mechanical failures are predictable; the fix is carrying the right spare parts and knowing how to install them. A broken chain mid-ride on gravel routes of the Flint Hills means you cannot proceed without repair.
Spare chain (100–120 grams), a folding chain tool, and a spare master link handle the most common drivetrain failure and weigh almost nothing. Spare brake pads ($10–$15 per set) prevent loss of braking power on descents; in remote terrain, brakes are critical for controlling speed on loose or steep downhills where a runaway bike ends in trees or cliffs. Carry 2–3 spare spokes in the correct length and gauge (5 grams each), rim tape, a spoke wrench, and a portable truing stand like the Park Tool TS-2 ($40) to straighten a bent wheel enough to get out.
A flat tire requires a spare tube or patch kit rated for all conditions; synthetic patches like those in Lezyne Patch Kits ($4) work in cold or high altitude where latex fails. Carry two plastic tire levers (not metal, which pinch tubes) and a hand pump like the Lezyne Alloy Floor Drive ($15–$25), which compresses small enough for a saddlebag while achieving sufficient pressure on the trail.
Essential Tool Kit Components
A multi-tool with allen keys in 2mm, 3mm, 4mm, 5mm, and 6mm covers most bikes. Needle-nose pliers handle broken spokes or bent brake levers. A multi-tip screwdriver fixes derailleur limit screws if they shift out of adjustment. Duct tape wrapped around a pencil (not the roll) weighs grams and repairs split shifter housings or torn bar tape in a pinch.
Emergency Communication Systems
On remote routes, your ability to call for help depends entirely on the device you carry, not on cell service. Garmin InReach devices (from $350 plus $15/month subscription) use satellite messaging and have a distress button notifying search and rescue; they work in true wilderness without cell coverage, essential on routes like the Kona Coastal Trail where the nearest road is miles from exposed terrain.
A personal locator beacon (PLB) like the ACR ResQLink+ ($400) transmits a distress signal via satellite to rescue services; it is single-use but sends a priority rescue signal. An InReach is better for remote cycling because it allows two-way messaging, letting you send status updates that allow a contact to cancel rescue if you resolve a minor issue independently.
Pre-Departure Communication Protocol
Before leaving, file a detailed itinerary with a contact: your planned route, waypoints, expected camp locations, dates, and exit time. Ask them to contact authorities if you miss your check-in window by more than two hours. Planned check-ins are free and work with basic cell service or satellite messaging.
Physical Conditioning and Acclimatization
Arriving under-prepared physically turns hard rides into survival mode, which narrows your margin for error and judgment. Test your fitness on a long day ride of 6–8 hours at home before attempting a remote multi-day route; this reveals whether your bike fit, pacing, and nutrition strategy work for you.
On high-altitude routes above 9,000 feet, like remote sections of the Colorado Trail, spend 2–3 days at altitude before hard riding. Altitude illness does not occur at sea level, so testing at home does not tell whether you tolerate elevation well. Ascend gradually: reach 8,000 feet on day one, rest on day two, then climb higher. This allows your body to produce additional red blood cells and adjust oxygen processing—a process requiring days, not hours.
Weather and Environmental Hazards
Flash floods are the leading cause of backcountry death in the Southwest. Never cross a stream swollen by distant rain upstream; the water will rise without warning. Check weather for the entire region, not just your location—a thunderstorm 20 miles away can send water down a normally dry wash within an hour. The Moab area experiences these floods repeatedly; waiting out the weather is not a delay, it is survival.
Know the local wildlife and protocols. In bear country of Colorado, California, and the Pacific Northwest, store food in bear-proof containers or hang it 12 feet high and 8 feet from tree trunks. Cyclists in grizzly habitat should carry bear spray like UDAP ($40–$50) holstered on a hip belt where you can access it in seconds. Practice drawing and spraying before the trip so the motion is automatic if you encounter a bear at close range.
First Aid and Injury Management
Carry a first aid kit specific to your environment: sterile gauze pads, antibiotic ointment, pain medication (ibuprofen or aspirin), antihistamine, anti-diarrheal medication, blister treatment like Leukotape or Moleskin, elastic bandage for sprains, tweezers for splinters, and scissors. Blisters are the most common injury on multi-day rides; Leukotape applied over hotspots before blisters form prevents most cases.
For serious injuries, know evacuation routes and communication methods. A broken collarbone requires evacuation and hospital care; you cannot ride out. If you lack satellite communication, backtrack to the last trailhead or hitch a ride with another rider. The presence of a satellite device affects your decision-making—you can attempt uncertain terrain knowing help is reachable in a true emergency.
Frequently Asked Questions
What communication device should I carry on a remote cycling route?
A Garmin InReach ($350 plus $15/month) is ideal for cycling because it provides two-way satellite messaging and distress capability. A personal locator beacon (PLB) like the ACR ResQLink+ ($400) works as backup for true emergencies when a single SOS signal is needed.
How do I prevent the most common remote cycling injuries?
Blisters are the leading injury on multi-day rides; apply Leukotape over hotspots (areas of friction) before blisters form. For mechanical failures, carry a spare chain, brake pads, spokes, and a basic tool kit so you can fix problems without abandoning the route.
How should I prepare for high-altitude remote cycling?
Spend 2–3 days at elevation to acclimatize before hard riding; this allows your body to produce additional red blood cells. Test your fitness on a 6–8 hour day ride at home first to ensure your bike fit and nutrition strategy work before committing to a remote multi-day route.
